


Welcome the Lovely Cupboard! Like me Heather is a full-time teacher and has taken on the challenge of balancing teaching, her blog, and her design business. Kudos Heather...Keep up the hard work! Head over and check out more of the Lovely Cupboard! I was inspired especially with some of her recipes!
Apparently I'm a little behind in blog world and am just recently getting swept up in ombre obsession along with everyone else. I decided to combine two things that I've loved seeing on Pinterest lately: OMBRE + PAINT CHIP ART.

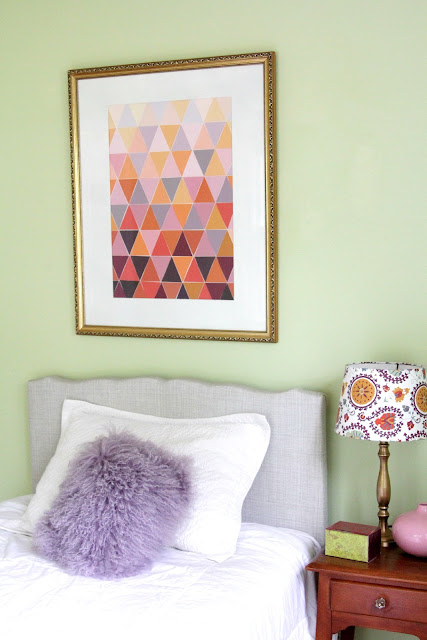
I found the gold frame at a flea market several months ago for $12 and had been waiting for something to house in it. The paint chip art was FREE, since I painted the matting and made two four trips to home improvement stores to collect the chips. Maybe I just have a guilty conscience, but my husband had to keep reminding me, "You're not stealing. They're free chips." Regardless of this true statement, I feel the need to sport a trench coat and dark sunglasses in Home Depot if ever I decide to do this project again.


Our guest room houses my clothes and serves as my dressing room. Most old homes have larger bath tubs than closets, and ours is no exception. The Mister gets our closet, so I get the whole guest room. (Don't feel bad for him; he has full reign of the basement.) Since I'm in this room a lot, seeing it undecorated each morning was bumming me out. I had a few pieces that I loved and decided to work with them to build the room. It's not finished yet but getting there.


I found this chair last year at a resale shop downtown that still had the ORIGINAL upholstery . Pictures just don't do it justice. The fabric has flecks of gold and different hues of coral in the pattern; it's so stinking gorgeous.


I had two gold lamps that I found at a flea mart for $5 each a while back. This summer, I found the shades at World Market and loved the color combo. The room was already green, so I decided to accent with gold, corals, pinks, and purples.


The "Fraggle Rock" pillow, as my husband jokingly deemed it, is from Pier 1.
DIY Ombre Paint Chip Art
Materials Needed:
-Poster board
-Scissors
-Glue stick or spray adhesive
-Paint chips
Process:
1. First of all, I recommend getting more paint chips than you think you'll need. You'll want to sort the chips into colors and then hues. I had all the lightest up top and worked my way down. That makes it easier to visualize what the final product will look like.
2. I laid one row out at a time and then glued it down. I used extra strength glue sticks, which were awesome. I avoid using spray adhesive because I wind up getting it all over my floors and furniture no matter how hard I try not to. I've read that plenty of other people used it for their paint chip projects and loved it.
3. Make sure that you are laying the chips down straight, or your whole pattern will be thrown off. I'm sure a more precise person would've measured, but I didn't want to take the time. After you finished gluing down your chips, trim off the edges of those that overlapped on the side of the poster.


I started with smaller paint chips and worked for several hours. (My first attempt is above.) Then I started over again with larger chips. I actually ended up leaving a little white space between each chip which allowed me some wiggle room as far as lining them up perfectly. I am all for cheap/free art, so this project was great despite being time consuming.
Clean up was "fun".
No comments:
Post a Comment